The Best Thing For Removing And Preventing Red Mite In Chicken Coops
Red mites are every chicken keeper’s nightmare when they get into the housing. Once established, they breed at astonishing speed and make nights miserable for your flock. Mites hide in cracks and corners of the coop by day, then emerge at night to feed, leaving hens stressed, weak, and reluctant to roost.
While dealing with mites on chickens themselves is a separate topic, this article focuses squarely on the coop environment. Here I’ll share the best ways I’ve found to remove red mites from housing and prevent them from coming back.
What red mites do to a coop and why prevention matters
A single female red mite can lay dozens of eggs in her lifetime, and in warm weather, those eggs can hatch within a week. That’s why a coop can go from “fine” to “overrun” almost overnight.
Wooden coops are particularly vulnerable because of all the cracks and joints, while plastic housing gives fewer hiding spots. Once mites are in the structure of a coop, you can’t rely on a quick clean. They wedge themselves into gaps, under roofing felt, inside perch sockets, and even in screw holes.
In my experience, prevention saves far more time and stress than cure. Once mites are out of control, you’ll spend weeks battling them back.
How to spot red mite activity in your chicken coop
I rarely wait for my hens to show signs of discomfort before checking the housing. The coop itself tells the story if you know where to look.
- Grey dust or clumps around perch ends and in corners are often clusters of mites.
- Red smears on a tissue wiped under a perch at night means feeding mites are present.
- Hens reluctant to go in at night is often the biggest giveaway — if they’re roosting outside or on top of the coop, it’s time to investigate.
These checks don’t take long. I keep a torch by the back door and nip out after dark once or twice a week in summer to spot problems early.
Immediate steps: how to get rid of red mite in a coop
Clearing bedding and scrubbing surfaces
The first job in any infestation is a complete clear-out. All bedding should be removed and either burned or sealed in waste bags. I dismantle anything that comes apart easily — perches, nest boxes, trays — so I can scrub and clean every surface.
Scrubbing alone won’t kill mites hidden deep in joints, but it gets rid of the organic matter they thrive in. I use a stiff brush followed by a detergent or poultry-safe disinfectant wash.
Using steam to kill red mites
Steam cleaning is one of the most effective physical methods because mites cannot survive sustained heat above about 44°C (111°F). A household steam cleaner can blast into cracks and joints, killing mites and their eggs where chemicals may not reach.
Steam needs persistence. Because new mites hatch daily, you should repeat the process every day for up to a week. I’ve found it works best when combined with other methods — a thorough clean, then steam, followed by diatomaceous earth or a spray to finish.
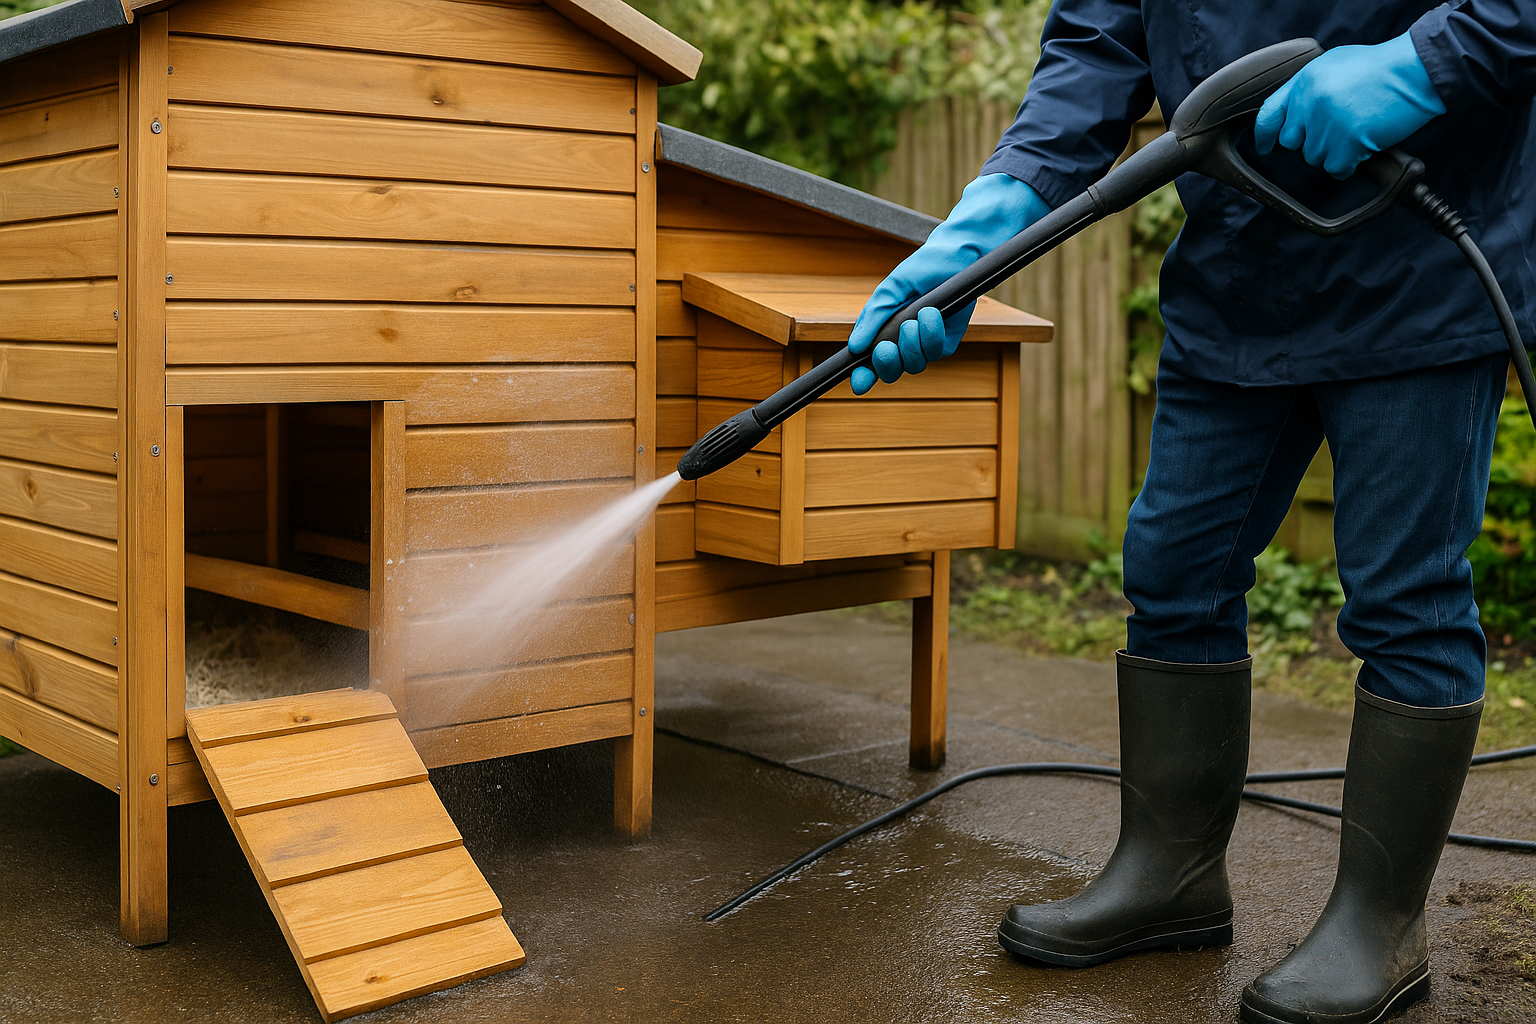
Using a pressure washer in the coop
A pressure washer is less about killing mites and more about flushing them out. The force of the water blasts eggs, droppings, and mites from cracks and corners. I’ve used mine on wooden coops after scraping down surfaces, and it’s surprising how much comes out.
The downside is the mess. You’ll need good drainage and a dry day, because a coop that’s left damp is just as attractive to mites. I always follow up once the wood has dried with powder or spray, otherwise survivors quickly re-colonise.
Using a blow torch in extreme cases
Some keepers use a blow torch on wooden joints to scorch mites and eggs. It’s certainly effective, but I’d treat it as a last resort for persistent infestations because of the risks.
- Remove hens to a safe distance and prevent them from getting near
- Never use on a plastic coop — it will melt instantly.
- Make sure all flammable materials, like straw or wood chippings, are completely removed
- On wood, there’s a genuine fire hazard, even if the flame is used lightly. Do not keep the flame in one place to minimise the risk of fire or damage.
If you do attempt it, work slowly, avoid direct flames on structural joints, and always have water nearby. Personally, I prefer steam because it’s safer, but I know keepers who swear by a cautious torching in stubborn infestations.
The best things chicken keepers actually use in coops
Diatomaceous earth
Diatomaceous earth (DE) is a fine powder that damages mites’ waxy shells, dehydrating and killing them. I dust it into corners, perch sockets, and nest box edges where mites travel. It isn’t a one-time fix — you’ll need to reapply after cleaning or rain.
I’ve found DE works best as part of a layered approach. On its own, it won’t stop a heavy infestation, but combined with steam or sprays it can keep numbers down between cleans. You can buy diatomaceous earth on Amazon.
Sprays and powders
Poultry-safe sprays are widely available in the UK. These are useful for soaking perch ends, cracks, and corners after a clean. I’ve had good results with them, especially in summer when mites are hatching daily. The key is coverage — don’t just spray the visible surfaces, but every nook and joint. Again, these are available from Amazon.
Plastic housing as a long-term option
Switching to plastic housing can be one of the most effective changes. While mites can still infest a plastic coop, cleaning is far easier. Smooth surfaces mean steam or sprays can reach everywhere, and there are fewer hiding places. Brands like Omlet and Nestera design their coops with mite resistance in mind, with removable parts and rounded joints.
In contrast, wooden coops need constant vigilance because even the smallest gap becomes a hiding place.
Breaking the red mite cycle in housing
One of the biggest mistakes keepers make is cleaning once and thinking the job’s done. Red mites hatch fast — often within 7 days. If you only clean once, you’ll be facing another outbreak a week later.
The most reliable approach is to repeat treatments every 5–7 days for at least three weeks. That way you catch mites at every stage of their life cycle. I follow a routine of clean, steam, powder, repeat. It takes effort, but it’s the only way I’ve managed to break the cycle in wooden housing.
Preventing mites returning to the coop
Sealing gaps and joints
Mites thrive in tiny gaps. In wooden coops, I seal cracks with wood filler or tape, and I make sure perch sockets are smooth and removable. The fewer crevices, the fewer hiding places.
Replacing roofing felt
Roof felt is notorious for harbouring mites. If you suspect they’re under the felt, the only answer is to strip and replace it with something less mite-friendly like corrugated plastic or Onduline. I’ve seen infestations massively decrease simply from changing the roof.
Choosing removable perches
Fixed perches make life easy for mites. I prefer removable ones that I can lift out, scrub, and treat separately.
Regular inspections and dusting
I make it a habit to check perches with a torch after dark once or twice a week in summer. It only takes a minute, but it often catches infestations early. Dusting with DE or powder after each clean adds another layer of prevention.
Switching to plastic coops has made this routine much easier. They aren’t immune to mites, but the design means I can clean and check every inch quickly, without worrying about endless hidden joints.
Using double-sided sticky tape
Using double-sided sticky tape is a method I found online from the Smallholding Diaries YouTube channel. Putting double-sided sticky tape at the perch ends is a simple way to both monitor for red mites and trap them as they travel to the birds at night. Because mites must cross the perch-to-wall junctions, placing tape there intercepts large numbers before they reach the hens. It is not a standalone cure, it works best alongside deep cleans, steam, powders and repeat treatments.
What you need
- High-tack double-sided tape, 25–50 mm wide, carpet or pest-monitoring grade
- Scissors and a clean cloth
- A metal tin or safe container if you plan to burn used tape
Where to place it
- Wrap a band of tape 2–3 cm in from each perch end, where mites cross from walls or sockets
- Add short strips around perch sockets and along cracks the mites use as “motorways”
- In very active coops, place a strip on the wall immediately adjacent to each perch end
How to apply for best results
- Clean and dry the surface thoroughly, dust and damp ruin adhesion.
- Press the tape down firmly, especially along edges so mites cannot crawl underneath.
- Fit tape after cleaning and before lights-out so it is in place for the night crawl.
- Replace daily during active infestations, or every few days when numbers drop.
Disposal
- Destroy trapped mites by burning the tape in a safe container, or seal it in a bag and bin it, do not compost.
Monitoring value
- Tape catches give you a quick read on activity, photograph the strips and note dates to track whether numbers are rising or falling. This helps judge if your clean-steam-powder routine is working.
Below is the video from the Smallholding Diaries YouTube channel. I personally think this is one of the best things for treating red mite in chicken coops and found it really helpful, so hopefully you will too.
Key takeaways: removing and preventing red mites in chicken coops
- Strip out bedding and scrub housing thoroughly.
- Use steam, pressure washing, or a blow torch (with extreme caution) to reach hidden mites.
- Apply DE or mite powders in corners and perch ends.
- Repeat cleaning every 5–7 days for several weeks to break the mite cycle.
- Seal gaps, replace roofing felt, and use removable perches.
- Use double-sided sticky tape at perch ends to trap mites.
- Consider plastic housing for easier long-term control.
Conclusion: keeping coops mite-free
Red mites are tough, but they’re not unbeatable if you stay on top of prevention. Regular inspections, deep cleans, and practical tools like steam cleaners and powders can keep housing under control. Together, this is the best thing for red mite in chicken coops.
For flock health and treatment advice, I’ve written a separate guide on How To Identify And Treat Red Mite Infestation In Chickens. Hopefully, these two guides, together, will give you the full picture. Staying proactive means your hens stay comfortable, your housing lasts longer, and you avoid the stress of a full-blown infestation.
Disclosure: This post may contain affiliate links. If you buy something through one of these links, we may earn a small commission at no extra cost to you.
Kevin O’Hara got his first chickens back in 1972. A backyard chicken keeper based in Yorkshire, he created of KeepingChickens.uk back in 2012. With years of hands-on experience, he shares practical, UK-specific advice to help others care for happy, healthy hens. Learn more about Kevin on the author page.


